


In a world that’s increasingly digital, the nostalgic allure of analog photography is making a remarkable comeback. Whether it’s the hands-on process, the anticipation of developing film, or the unique aesthetic that only film can offer, there’s no denying that 35mm film photography is experiencing a resurgence. But with the return of film comes a myriad of questions—one being, “can i cut 35 mm film with scissors?”
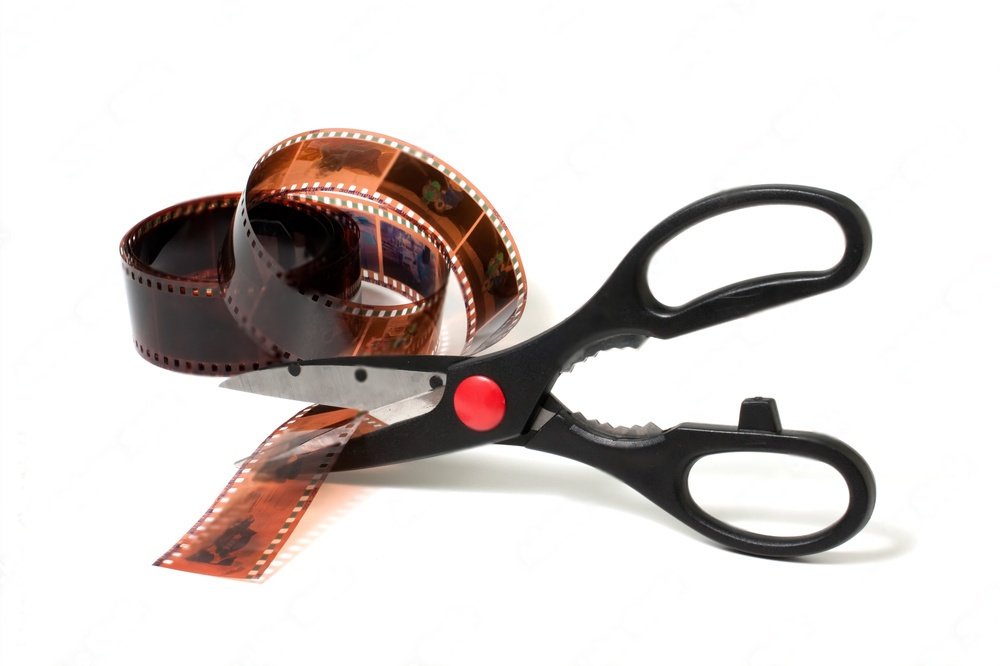
Yes, you can cut 35mm film with scissors. However, it is essential to ensure that you are cutting the film in complete darkness when removing it from the canister to avoid exposing and ruining the undeveloped images. Using sharp scissors, (preferably steel) will help achieve a clean cut. Once the film is developed, you can also use scissors to trim it down for placement in photo albums or frames. Just be cautious and precise to maintain the integrity of the images.
Understanding the Anatomy of 35mm Film
Before you even think about cutting into your precious film, it’s essential to understand what you’re dealing with. A standard roll of 35mm film consists of several layers, each playing a crucial role in capturing your images. There’s the base, typically made of polyester or acetate, which provides structural support. Then there’s the emulsion, a light-sensitive layer that holds the actual image once it’s developed. Finally, those tiny sprocket holes along the edges? They help guide the film through your camera and ensure everything stays aligned.
Precision is key when handling film, especially if you’re thinking about cutting it. The film is delicate, and any damage to the emulsion or sprocket holes can ruin your images. Being knowledgeable about the composition of film helps you appreciate the care needed when you’re handling those rolls.
An Interesting Fact About 35mm Film
Did you know that 35mm film was originally developed for motion picture use? In 1889, George Eastman, the founder of Kodak, began producing 35mm film for Thomas Edison, who used it in his motion picture camera. The format was later adopted for still photography in the early 20th century, becoming the standard for both amateur and professional photographers. Its adaptability and superior image quality played a significant role in establishing it as the go-to film format during the mid-1900s, a legacy that continues even in today's digital era.
The Pros and Cons of Cutting Your Own Film
Pros
Cost-Effectiveness
One of the primary benefits of cutting your own film is cost savings. By handling your film cuts in-house, you eliminate the expense of professional processing services. This is especially beneficial for hobbyists who are frequently developing and handling film.
Creative Flexibility
Cutting film yourself allows for greater control over the creative process. You can choose exact framing and compositions for prints, customizing to your artistic vision. This flexibility is invaluable for photographers who prioritize unique or personalized outcomes.
Immediate Access
Handling your film cuts gives you quick and immediate access to your negatives. This is particularly advantageous in time-sensitive projects where delays due to lab processing could be detrimental.
Cons
Risk of Damage
The biggest drawback to cutting your own film is the potential risk of damage. Without the proper tools and environment, there’s a higher chance of cutting through or scratching the emulsion layer, ruining the images.
Requires Skill and Precision
Accuracy in cutting film is not easily mastered and can take time to perfect. Until you’ve honed this skill, the risk of mishandling film remains high, which can be discouraging for beginners.
Time-Consuming
The process of carefully cutting and handling film is inherently time-consuming. For those with busy schedules or many rolls to develop, this can be a significant disadvantage compared to professional services that handle the workload efficiently.
Tools and Techniques for Cutting Film
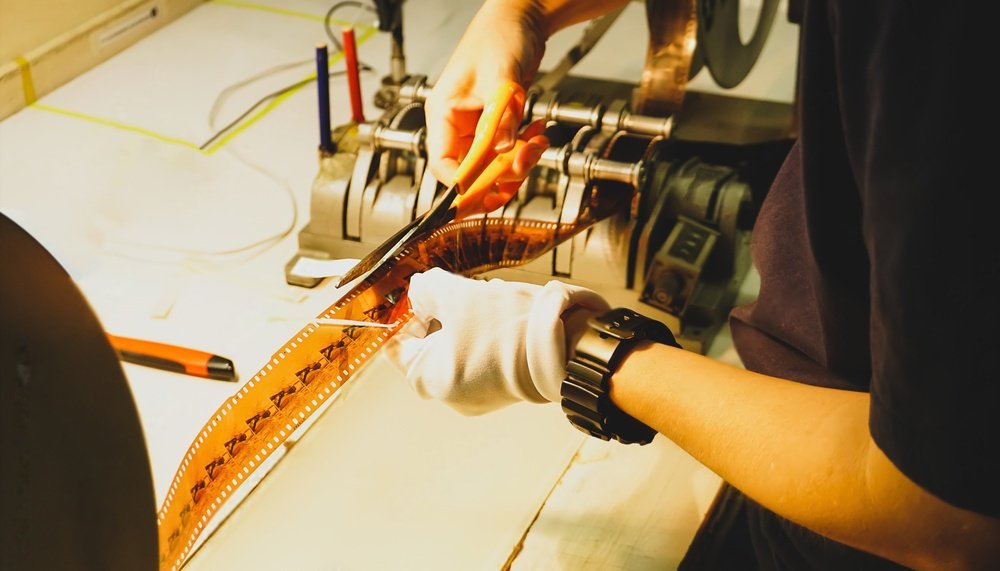
If you’re determined to try cutting your film, having the right tools can make all the difference. While you might be tempted to reach for any old pair of scissors, investing in precision scissors or a dedicated film trimmer would be wise. These tools are designed to provide clean, accurate cuts that minimize the risk of damaging your film.
Here’s a simple step-by-step guide to cutting 35mm film with scissors:
- Gather Your Tools: Precision scissors or a film trimmer, tweezers, and a clean workspace.
- Prepare Your Film: Handle the film in a dimly lit room to prevent accidental exposure. Use tweezers to hold the film gently.
- Cut with Care: Position the film on a stable surface. Use the scissors to make precise cuts, ensuring you maintain the integrity of the sprocket holes.
- Check Your Work: After cutting, inspect the film for any signs of damage. Ensure that the edges are smooth and the sprocket holes are intact.
Always prioritize precision and safety. It’s not just about cutting the film; it’s about preserving its quality for future use.
Tips for Success in Film Cutting
Mastering the art of cutting film requires practice and patience. Start by using test rolls to hone your skills before moving on to any valuable film you may have. Practicing on inexpensive film can build your confidence and improve your technique. Consistency is key, so aim to maintain a steady hand throughout the process.
Also, don’t forget to account for the right lighting conditions. Too much light can expose the film, rendering it useless. Work in a controlled environment where you can focus entirely on the task at hand without distractions.
Creative Uses for Cut Film
Once you’ve mastered the basics of cutting film, the creative possibilities are endless. You can experiment with projects like creating double exposures or crafting unique collages. By cutting and splicing different sections of film, you can create layered images that offer depth and intrigue.
For instance, try combining scenes from different locations or matching contrasting colors and textures. The art of film cutting allows you to transform simple photos into a narrative or visual story that’s uniquely yours.
Conclusion:
Cutting 35mm film with scissors is not for the faint-hearted, but it’s undeniably rewarding for those with patience and a creative spirit. From understanding the anatomy of the film to exploring the pros and cons, we’ve covered essential bases that should equip you with the knowledge to make informed decisions.
Remember, practice makes perfect. Experiment with different techniques, take calculated risks, and most importantly, enjoy the process. If you’ve tried cutting film yourself, we’d love to hear about your experiences and any tips you might have. Share them in the comments below!
For more DIY photography tips and insights, subscribe to our newsletter. Stay inspired and keep capturing those timeless moments on film.
(FAQs) on Film Cutting
While it’s possible to use regular scissors, it’s highly recommended to use precision scissors or a film trimmer specifically designed for cutting film. These tools help ensure clean, accurate cuts and minimize the risk of damaging your film.
To prevent damage, work slowly and carefully in a dimly lit environment to avoid accidental exposure. Make sure to use appropriate tools, like precision scissors, and handle the film gently with tweezers to avoid scratching it.
Yes, learning to cut film can be worthwhile for beginners who are interested in exploring the creative aspects of photography. While the process requires practice and patience, cutting your own film can lead to cost savings and creative control over your photography projects.
The biggest challenge is maintaining precision and avoiding damage to the film. This requires a steady hand, the right tools, and a controlled environment. Additionally, the time required to develop this skill can be significant but is rewarding for those who value the creative process.
To practice without risking valuable negatives, use test rolls or expired film. This way, you can hone your skills and build confidence before handling important or irreplaceable film.
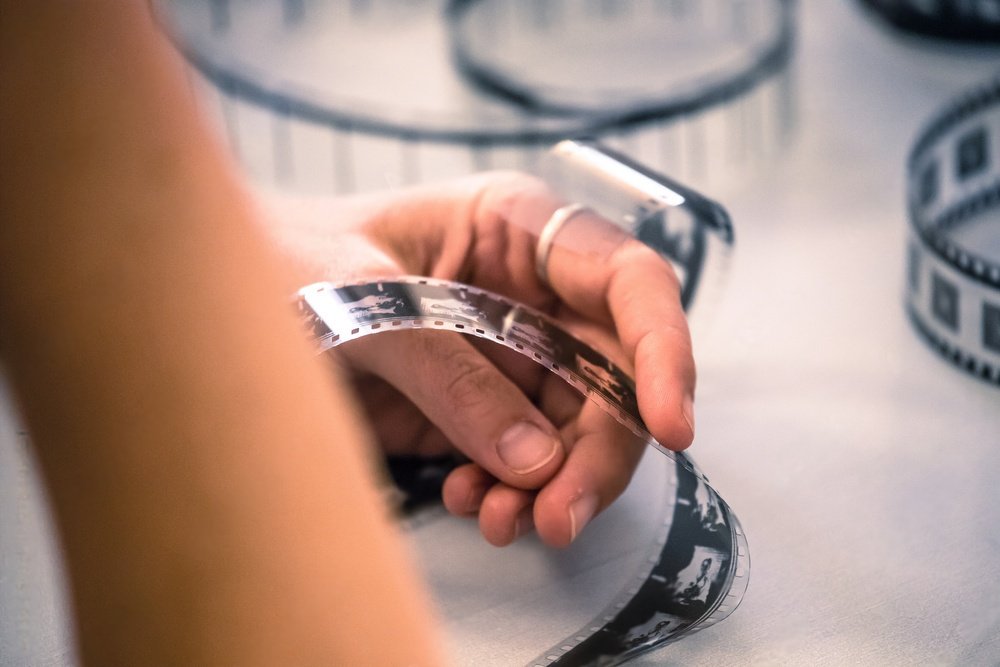
Touching film negatives with bare fingers is generally discouraged because the natural oils and dirt present on our skin can transfer onto the film, potentially causing damage such as fingerprints, smudges, or scratches that may affect image quality. To handle film negatives safely, it is advisable to use clean, lint-free gloves or tweezers.
If gloves are not available, holding the negatives by the edges is a good practice to minimize contact with the emulsion surface. Protecting the integrity of your negatives is vital for preserving the quality of your images and ensuring they can be successfully developed or scanned.
When it comes to the effects of magnets on 35mm film, there’s some good news: magnets do not ruin or affect the film itself. 35mm film is composed of a plastic base coated with light-sensitive chemicals, meaning it is not susceptible to magnetic fields. Unlike other types of media, such as digital storage devices that rely on magnetic storage, physical film captures images via chemical reactions, not magnetism.
Therefore, even strong magnets will not directly harm or alter 35mm film. However, it’s still wise to handle film with care and protect it from environmental factors like heat and humidity, which can degrade the film’s quality over time.


